Double Unders: A How-To
By: Reuben Pearlman
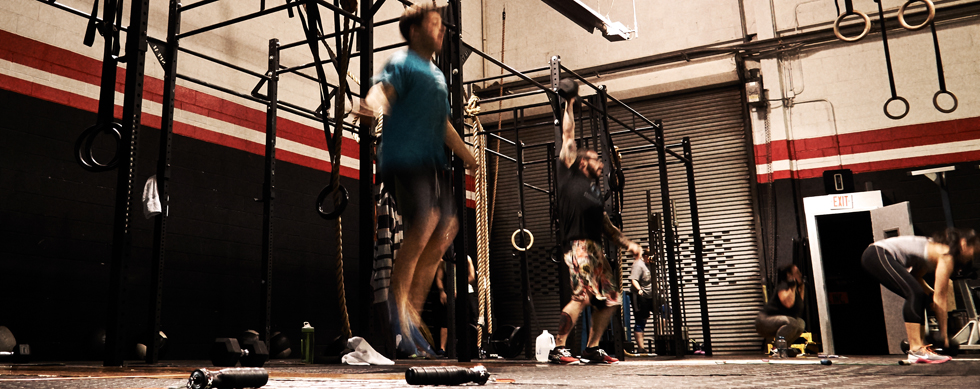
A Double Under (or “DU” in CrossFit circles) is performed with a jump rope, with the rope swinging twice under your feet for each jump. That’s a deceptively simple explanation, so I offer you this definition from Jerred Moon as an alternative: “a conditioning exercise that may or may not have been used in POW camps during Vietnam to punish infractions.” Regardless of your personal relationship with DUs, they remain a quintessential CrossFit movement that will rear its ugly head often in WODs.
For those of you who, like me, struggle with DUs, you know all too well that familiar scenario: getting continuously whipped by the rotating rope across the back of your legs, arms and, occasionally, your ear. And if getting whipped wasn’t enough, it seems like once you start, you can’t stop – that is until you give up completely and drop (or throw) your rope.
Who better to get DU advice from than Dave Newman, owner of RX Smart Gear and DU guru? Newman has broken the movement into three primary components: bounding, rotational mechanics and timing. He’s even created drills to work on each component and cues to fix the most common DU errors.
Bounding
The first mistake many athletes make when attempting DUs is to whip the rope as fast as possible. This technique leads to those all too familiar welts I alluded to earlier. According to Newman, the height of the jump is the most important aspect of the double under. To make the jumps efficient and smooth, Newman says the body should be like a pogo stick, with the athlete staying on his toes. Also, the longer you are in the air, the more you are able to slow the speed of the rope – this will also lessen the potential (and fear) of whipping one’s self.
The ideal posture for DUs is characterized by a very upright, straight body. Tuck in the hips, engage the glutes and quads, and keep the core tight. Finally, make sure the back of your neck is long and your chin is tucked in. In a DU, the calves do most of the work.
Rotational Mechanics
Next up is what Newman calls “rotational mechanics,” a term that refers to the positioning of the arms and hands. Poor hand positioning is one of the biggest causes of missed DUs. As people get tired, their hands drift out from their body, which changes the shape of the rope.
Ideally, the elbows should be by the athlete’s side and drawn back, with the palms forward. There should be about 4 to 6 inches between the hip crease and the wrist. If you were wearing a belt buckle—which is usually in the middle between the hip crease and hip bone—your wrists would be in line with the belt buckle. If your hands are too tight against your body, it creates a narrow rope shape. If the hands go too wide, the rope shortens. The ideal is a happy medium.
The athlete should look at a spot on the ground about 10 to 15 feet in the distance. The goal is to have the rope hit the same spot each time, about 12 inches in front of your toes. If your hands are too far forward, the rope is going to hit the ground farther out from the body, which causes the rope to rebound too quickly.
The next element of rotational mechanics is wrist rotation. When the wrist is the swivel, the forearms and the grip can be relaxed. Newman said the movement is a snapping motion, like the one you’d do if you washed your hands and couldn’t find a towel. The snapping motion you’d use to dry your hands is the same type of movement you want in a DUs. The only difference is you are turning that snapping motion into a rotation.
Timing
According to Newman, most people jump when they first see the rope, which is too soon. The best time to jump is right after the rope passes below the knee. As Newman explains, the rope has farther to travel than your body. It has a 360-degree orbit to make around the body, and the athlete only has to move up about 4 inches. This means it’s essential to be patient and wait for the rope. You can start prepping your body by bending your knees and loading up, but the minute your feet leave the ground, the rope should be passing under your body.
Bounding Drills
1. Grab a partner or set up a video camera or phone to record. Start by bounding as if doing low singles, and then bound higher as if doing DUs (don’t use a rope). Pick a reference point on the horizon and try to go above that line or mark when switching to DUs. There should be a noticeable difference between the height of the low and high jumps. Next, try this drill with a jump rope.
2. To practice bounding off your toes, have a friend stand on a box and hold a stick or a PVC pipe over your head at about the height you need for a double under. Practice bounding up and down (without a rope) and touching your head to the stick each time.
In this drill, try to stay as tall as you can, making your body as long as possible. Hold the stick at different heights for your partner so he or she can see the difference between a low single and a high double. Work on achieving a slight knee flex with very engaged quads when jumping higher. Use the flex to spring to your toes, and keep your feet together.
Rotational-Mechanics Drill
To learn to feel the correct isolated wrist movement, position a 5-gallon bucket on each side of the athlete. Each bucket should be on its side and propped up on boxes to sit at waist level. The athlete holds a 2-foot PVC pipe in each hand and tries to paint the insides of the buckets in a smooth, continuous movement using only the wrists. Position the boxes and buckets to create correct posture, and ensure the end of the PVC is just touching the inside of the bucket. It’s surprisingly difficult to make a smooth, round shape.
“People will start going ‘clank, clank, clank, clank’” as they bang the stick into the bucket, Newman says. The goal is to relax and release your wrist, letting the stick make a full circle.
Timing Drills
1. To ensure your timing is consistent, Newman recommends alternating between 10 singles and 10 doubles. “If you can do that smoothly, it means you have good control over your rope speed and pace,” Newman says.
He is not a proponent of alternating between one single and one double under because he thinks it reinforces a habit of switching from high to low jumping rather than getting the flow of bounding high for DUs.
2. Another timing drill is try to do the slowest double under you can possibly achieve. This will allow you to really understand the timing of the movement, helping you feel how it’s not just about flinging the rope around as quickly as possible. To do this, jump as high as you can. You can even break form and bend your knees. Just slow the whole movement down; turn the rope continuously but slowly.
Looking for more help with your Double Unders? Check out CrossFit 718’s Double Unders Workshop on Sunday, December 6th at 2 p.m.!


Leave a Reply
Want to join the discussion?Feel free to contribute!